Atlassian Crowd OmniAuth Provider
Authenticate to GitLab using the Atlassian Crowd OmniAuth provider.
Configure a new Crowd application
-
Choose 'Applications' in the top menu, then 'Add application'.
-
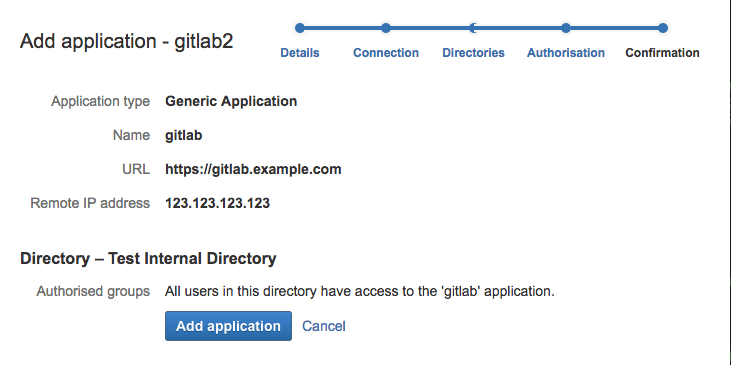
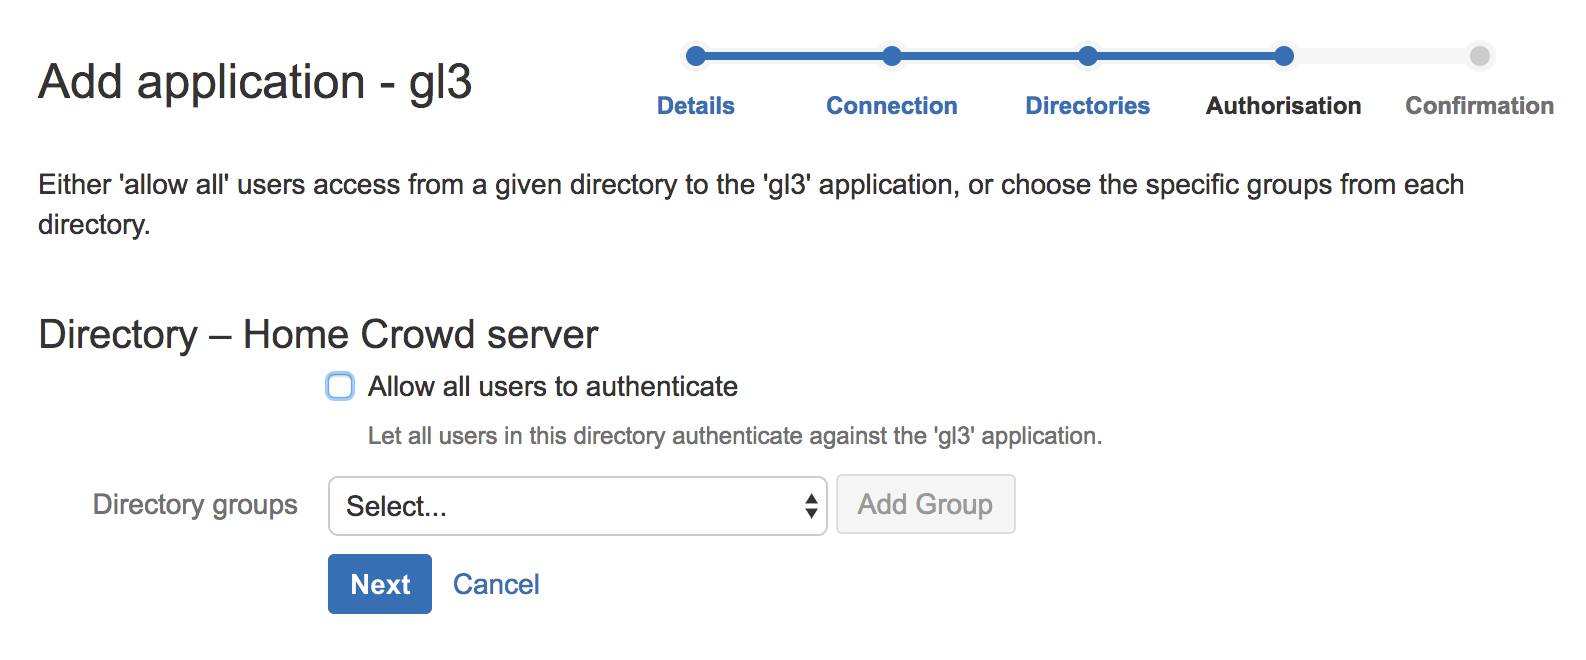
Go through the 'Add application' steps, entering the appropriate details. The screenshot below shows an example configuration.
Configure GitLab
-
On your GitLab server, open the configuration file.
Omnibus:
sudo editor /etc/gitlab/gitlab.rbSource:
cd /home/git/gitlab sudo -u git -H editor config/gitlab.yml -
See Initial OmniAuth Configuration for initial settings.
-
Add the provider configuration:
Omnibus:
  gitlab_rails['omniauth_providers'] = [
    {
      "name" => "crowd",
      "args" => {
        "crowd_server_url" => "CROWD_SERVER_URL",
        "application_name" => "YOUR_APP_NAME",
        "application_password" => "YOUR_APP_PASSWORD"
      }
    }
  ]
Source:
- { name: 'crowd', args: { crowd_server_url: 'CROWD_SERVER_URL', application_name: 'YOUR_APP_NAME', application_password: 'YOUR_APP_PASSWORD' } } -
Change
CROWD_SERVER_URLto the URL of your Crowd server. -
Change
YOUR_APP_NAMEto the application name from Crowd applications page. -
Change
YOUR_APP_PASSWORDto the application password you've set. -
Save the configuration file.
-
Reconfigure or restart for the changes to take effect if you installed GitLab via Omnibus or from source respectively.
On the sign in page there should now be a Crowd tab in the sign in form.
Troubleshooting
If you see an error message like the one below when you sign in after Crowd authentication is configured, you may want to consult the Crowd administrator for the Crowd log file to know the exact cause:
could not authorize you from Crowd because invalid credentialsPlease make sure the Crowd users who need to login to GitLab are authorized to the application in the step of Authorisation. This could be verified by try "Authentication test" for Crowd as of 2.11.


